
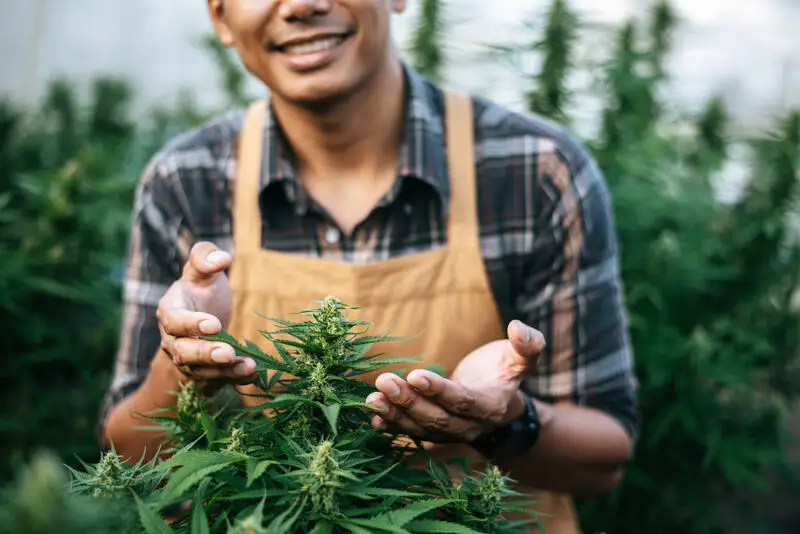


- ScrOG works by holding cannabis branches in a horizontal plane, so every bud site receives the same light intensity — no apex dominates, no lower branches are shaded out.
- Screen height of 40 to 60 cm above the pot is the practical standard for most indica and hybrid strains; sativa-dominant genetics may need the screen 10 cm higher.
- A full training run in ScrOG takes 3 to 6 weeks of vegetative growth after screen installation, followed by the flip to flower at 70 to 80 percent screen fill.
- Soil, coco, and hydro all work well with ScrOG; faster-growing coco and hydro plants can fill a screen more quickly, reducing total veg time.
- Even light distribution is the central principle: a flat canopy under a consistent light source means every cm² of the canopy footprint produces buds of comparable quality and density.
- A 120 x 120 cm tent running ScrOG under 600 W to 700 W LED can produce 500 to 700g dry weight when screen fill and flip timing are correctly executed.
Visualising the ScrOG Concept
Picture a standard grow tent. Without any training, a cannabis plant grows upward in a roughly conical shape: a tall dominant stem at the centre, progressively shorter branches radiating outward as you move down the plant. The grow light above illuminates the apex intensely and the lower branches receive progressively less photon energy as distance and shading reduce light intensity.
Now picture a horizontal mesh screen suspended across the width of the tent, about halfway up. As the plant grows and each branch tip reaches the screen level, the grower bends it sideways and threads it under the next mesh opening, redirecting that branch’s growth outward across the horizontal plane. Over several weeks, dozens of branch tips are woven into the screen in all directions until the screen surface is covered with an even green mat of growing tips, each one sitting at exactly the same height below the light.
When this plant flowers, every single one of those branch tips — which would have been a shaded, underdeveloped lower bud without training — becomes a full, dense cola receiving direct, unobstructed light. This is the ScrOG principle: transform vertical growth into horizontal canopy coverage to maximise the productive use of your light source.
Materials and Build Guide
Building a ScrOG setup requires only a few inexpensive materials. The screen itself is the primary component.
Frame construction options:
- Wooden dowels or garden stakes: The simplest approach. Four vertical stakes inserted into the growing containers or clipped to tent poles support a horizontal frame of four dowels, across which nylon string or paracord is tied in a grid pattern.
- PVC pipe frame: Lightweight, durable, and easily adjusted. Standard 20mm PVC pipe and corner connectors from any hardware store allow a fully custom screen frame in any dimension. The frame rests on the pot rims or hangs from tent support bars.
- Pre-made adjustable SCROG nets: Available from grow equipment retailers in 60 x 60 cm to 120 x 120 cm sizes. Usually nylon mesh with 7 to 10 cm openings. Height-adjustable via Velcro or tie straps. Convenient for first-time ScrOG builds.
Screen dimensions for standard tent sizes:
| Tent Size | Recommended Screen Size | Plants | Recommended Light |
|---|---|---|---|
| 60 x 60 cm | 55 x 55 cm | 1 | 200 to 300 W LED |
| 80 x 80 cm | 75 x 75 cm | 1 to 2 | 300 to 400 W LED |
| 100 x 100 cm | 95 x 95 cm | 1 to 2 | 400 to 500 W LED |
| 120 x 120 cm | 115 x 115 cm | 1 to 4 | 600 to 700 W LED |
| 150 x 150 cm | 140 x 140 cm | 2 to 6 | 700 to 1000 W LED |
| 240 x 120 cm | 230 x 115 cm | 4 to 8 | 2 x 600 W LED |
Step-by-Step Plant Training Timeline
ScrOG is a multi-week process with distinct phases. Understanding the timeline helps you plan the overall grow schedule.
- Germination and early veg (weeks 1 to 3): Grow plants normally. Top at node 5 to 7 to initiate multi-cola branching. Allow the topped plant to recover for 7 to 10 days before installing the screen.
- Screen installation (week 3 to 4): Install the screen at 40 to 60 cm above the pot rim before any branches have grown through the screen height. This is important — installing the screen after branches have grown above it is more difficult and risks damaging established growth.
- Active training phase (weeks 4 to 8): Visit the grow space every 1 to 2 days. As each branch tip grows up through a mesh opening, gently bend it sideways and tuck it under the next opening in the direction of empty screen space. Work from the centre outward to distribute growth evenly.
- Pre-flip assessment (weeks 6 to 8): When 70 to 80 percent of the screen surface is filled, stop all weaving and transition the light schedule to 12 hours on / 12 hours off to initiate flowering.
- Early flower maintenance (weeks 9 to 11, or flower weeks 1 to 3): Continue tucking any new growth that extends above the screen during the first 2 to 3 weeks of flower, when stretch is still active. Perform lollipopping to remove all sub-canopy growth.
- Hands-off flowering (weeks 11 to 20+): Once the plant commits to flower development and vertical growth has stopped, leave the canopy undisturbed. Focus on nutrition, irrigation, and environmental management through to harvest.
Screen Height Positioning
The height of the screen above the pot is a critical variable that affects the entire grow. Set it too low and branches become cramped, restricting airflow and making future training difficult. Set it too high and the canopy fails to develop a tight, even structure and branches flop rather than holding their trained position.
The standard range of 40 to 60 cm above the pot rim works for the majority of hybrid and indica-dominant strains. This height provides:
- Adequate stem length below the screen for plant support and airflow
- Sufficient space for lollipopped growth to be removed without disrupting the screen
- Room for root zone management and pot inspection without disturbing the trained canopy
For tall sativa-dominant strains with a high flowering stretch, consider positioning the screen 60 to 70 cm above the pot to allow more room for the canopy to develop before the flip. This is particularly relevant in tents taller than 200 cm where vertical space is not the primary constraint.
How Long to Run ScrOG Training
Most growers run 3 to 6 weeks of active ScrOG training after screen installation before reaching the 70 to 80 percent fill target. The actual duration depends on:
- Number of branches going in: A plant topped twice enters the training phase with 4 main branches. A plant topped three times enters with 8. More branches means faster screen fill.
- Strain growth rate: Fast-growing sativa-dominant or hybrid genetics can fill a 120 x 120 cm screen in 3 to 4 weeks of training. Indica-dominant strains with slower lateral growth may need 5 to 7 weeks.
- Growing medium: Coco coir and hydroponic systems typically produce faster vegetative growth than soil, accelerating screen fill by 1 to 2 weeks.
- Light intensity: Higher-intensity LEDs pushing 700 µmol/m²/s or more during veg accelerate growth compared to lower-intensity setups.
ScrOG with Different Growing Mediums
Soil: The standard medium for ScrOG. Slightly slower growth rate means more gradual screen fill, which is forgiving for beginners still learning the weaving rhythm. Buffering capacity in rich soil mixes reduces sensitivity to minor watering or feeding inconsistencies during training.
Coco coir: A popular choice for experienced ScrOG growers. Faster growth rate shortens total veg time. Requires more frequent watering and precise nutrient management (coco has no inherent buffering), but the growth response to correct feeding is excellent. Screen fill time typically 1 to 2 weeks shorter than equivalent soil grows.
Hydro (DWC or NFT): The fastest growth rates of any growing medium when maintained correctly. A well-tuned hydroponic ScrOG can fill a 120 x 120 cm screen in 3 to 4 weeks of training, compared to 5 to 7 weeks in soil. Requires more technical knowledge and careful monitoring of nutrient solution EC, pH, and water temperature. Not recommended for first ScrOG builds.
Lighting Requirements for ScrOG
ScrOG’s yield advantage is fundamentally a lighting efficiency argument: by flattening the canopy so that every cm² receives direct light at the same intensity, the grower eliminates the diminishing-returns problem of illuminating a tall, conical plant where lower growth is too far from the light source to produce quality buds.
For ScrOG to deliver this efficiency benefit, the light source must be capable of illuminating the full canopy footprint at adequate intensity. Key considerations:
- Light spread: Modern full-spectrum quantum board LEDs with wide-angle lenses distribute light more evenly across the canopy than older single-point HID sources. This is particularly important in large (120+ cm) tents where edge-to-centre light intensity variation can be significant.
- Minimum intensity: Target 400 to 600 µmol/m²/s PPFD at the canopy level during vegetative training, and 700 to 900 µmol/m²/s during flowering. Insufficient intensity at canopy edges is a leading cause of airy, underdeveloped edge buds in ScrOG setups.
- Light-to-canopy distance: Follow manufacturer recommendations for your specific LED. Quantum boards typically run at 40 to 60 cm from the canopy during flower. This distance should be measured from the light to the top of the ScrOG canopy, not the floor of the tent.
Yield Expectations by Tent Size
| Tent Size | Light | Plants | Expected Yield (dry) | Notes |
|---|---|---|---|---|
| 60 x 60 cm | 200-300 W LED | 1 | 60 to 120 g | First-time ScrOG ideal size |
| 80 x 80 cm | 300-400 W LED | 1 to 2 | 100 to 180 g | Good balance of size and manageability |
| 120 x 120 cm | 600-700 W LED | 2 to 4 | 300 to 600 g | Most popular setup; strong yield potential |
| 150 x 150 cm | 700-1000 W LED | 3 to 6 | 500 to 900 g | Advanced growers; requires strong environmental control |
Frequently Asked Questions
What does a ScrOG setup look like?
A ScrOG setup consists of one or more cannabis plants growing in containers beneath a horizontal mesh screen. The screen is fixed at 40 to 60 cm above the pot rim using stakes or tent poles. As branches grow up through the mesh openings, the grower bends each one sideways and tucks it under the next opening, gradually building a flat green canopy that covers the entire screen surface. By the time the flip to flower occurs, the screen looks like a continuous green mat at a uniform height, with all the stems below it and all the bud sites above it at equal distance from the light.
How long does ScrOG training take?
ScrOG training typically runs for 3 to 6 weeks after the screen is installed, depending on plant vigour, strain, and how many tops the plant has received. Training continues until 70 to 80 percent of the screen is filled, at which point the grower switches to a 12/12 light schedule to trigger flowering. Total time from seed to screen fill typically ranges from 6 to 10 weeks of vegetative growth.
What size screen do I need for my tent?
The screen should match your tent’s floor footprint as closely as possible, with 2 to 3 cm clearance at each edge for airflow and access. For a 60 x 60 cm tent use a 55 x 55 cm screen; for 80 x 80 cm use 75 x 75 cm; for 120 x 120 cm use 115 x 115 cm. The goal is to cover the maximum usable canopy area while still allowing you to reach into the tent for training and plant management.
Can I use ScrOG in coco or hydro?
Yes. ScrOG works in all growing mediums. In coco or hydro, faster growth rates actually accelerate screen fill, reducing overall vegetative time. The primary consideration is ensuring containers are positioned consistently so the screen height remains uniform across all plants. In deep water culture setups, plan for pot and net cup height when calculating screen height above the growing medium surface.
Choosing the Right Mesh Opening Size
The mesh opening size in a ScrOG screen is a practical variable that affects how easily you can weave branches and how well they stay in position after training. The standard guidance of 5 to 10 cm covers a useful range, but the right size depends on your specific grow style and the size of the branches you’re training.
5 to 6 cm openings: Best for growers who train frequently (every 1 to 2 days) and prefer precise control over branch placement. Branches tuck into a 5 cm opening easily when they are young and flexible. Once settled, the tight mesh holds them firmly in place even as buds develop weight. The main drawback is that harvesting from a tight mesh requires cutting the net or unweaving branches, which is time-consuming.
7 to 8 cm openings: The most versatile size. Branches thread through without difficulty, the mesh provides reliable support, and harvest access is easier than with tighter mesh. This is the practical default for most ScrOG builds using nylon cord or wire mesh.
9 to 10 cm openings: Common in pre-made SCROG nets. The larger openings require less precision in weaving and make harvest straightforward, but give slightly less positional control. Branches may sag or shift position more readily during late flowering when bud weight increases.
Whatever mesh size you use, the goal is the same: each branch tip woven horizontally through an opening should stay where you put it without requiring constant re-adjustment. If branches consistently pop back to vertical after weaving, either the mesh opening is too large or the branch is too woody and needs to be weaved sooner.
Defoliation Strategy During ScrOG
Defoliation — the deliberate removal of fan leaves to improve light penetration and airflow — is a complementary technique that many ScrOG growers integrate into their training protocol. Used incorrectly it stresses the plant and reduces yield; used strategically it enhances bud site exposure and airflow through the dense canopy.
During vegetative training: Light defoliation of very large fan leaves that are blocking light to nearby developing bud sites is acceptable throughout the training phase. Limit this to leaves that are clearly shading lower nodes that you want to encourage into the screen. Do not strip the plant — fan leaves are solar panels that drive photosynthesis and growth during the vegetative phase.
Week 3 of flower: This is the primary defoliation window in a ScrOG grow. By week 3, the flowering stretch has largely completed, bud sites are clearly established, and the lower canopy is definitively sub-screen. Remove all growth below the screen (lollipopping) and remove large fan leaves above the screen that are directly shading adjacent bud sites. The goal is not a bare canopy — it is improved light penetration to the mid-canopy.
Late flower (weeks 6 to 8): Minimal or no defoliation. The plant needs its remaining leaf mass for photosynthesis to fuel final bud development. Removing too much leaf material at this stage reduces the photosynthetic capacity precisely when energy demand for resin and terpene production is at its peak.
Harvesting from a ScrOG Setup
Harvesting from a ScrOG grow is more labour-intensive than harvesting freestanding plants, but manageable with the right approach. The primary challenge is that branches are interwoven through the mesh, making it impossible to simply lift the plant out as a unit.
There are two main approaches:
Cut and unweave: Harvest the plant in sections by cutting individual branches from the main stem below the screen and then threading them back through the mesh from below. This preserves the branches intact and makes trimming easier. Work methodically from one end of the screen to the other, labelling branch groups if you want to track different sections of the canopy separately.
Cut the screen: With nylon cord screens, the faster approach is to simply cut the screen away from the frame using scissors, snipping between branches. This loses the screen but saves significant time. If you use this method, measure and rebuild the screen for the next grow — keeping a template of the original dimensions makes rebuilding quick.
Whichever approach you use, have your drying space ready before cutting. ScrOG harvests produce large volumes of material simultaneously and drying space is frequently the constraint growers underestimate.
ScrOG and Integrated Pest Management
The dense canopy created by a successful ScrOG setup creates both an advantage and a vulnerability from a pest and disease perspective. The advantage is that strong, even growth and high photosynthetic activity create a robust plant better able to withstand minor pest pressure. The vulnerability is that the canopy density can create microclimates — particularly at the sub-screen level — that are ideal for spider mites, fungus gnats, and botrytis (bud rot).
Proactive management is more effective than reactive treatment in ScrOG grows because the dense structure makes thorough treatment of established infestations difficult without disturbing the trained canopy. Key prevention practices:
- Maintain low humidity below 60 percent during vegetative training and below 50 percent during flowering
- Ensure strong airflow both above and below the screen at all times
- Perform the sub-screen lollipopping promptly after the flip to eliminate the humid, stagnant zone that develops in untreated undergrowth
- Inspect the undersides of leaves in the mid and lower canopy weekly for spider mite eggs or early signs of powdery mildew
- If treating with foliar sprays, do so during lights-off to minimise leaf burn risk and allow foliage to dry before the next light cycle
The ScrOG vs. Single-Plant Natural Grow: A Direct Comparison
To quantify the benefit of ScrOG over doing nothing, it helps to compare two identical plants from the same genetics, grown under the same light, in the same size tent, with one key difference: training.
Plant A grows naturally with no topping or training. It develops a central cola that receives full light intensity and numerous smaller branches that receive diminishing light as they sit further from the apex and are increasingly shaded. At harvest, approximately 30 to 40 percent of the plant’s total potential yield sits in the well-developed central cola. The remaining 60 to 70 percent is distributed across lower branches that received insufficient light to develop dense, comparable buds.
Plant B is topped twice and trained under a ScrOG screen until 75 percent fill before the flip. At harvest, 8 main colas of roughly equal size sit at the same distance from the light source. Lower growth was removed via lollipopping at week 2 of flower. Light is distributed across the entire canopy footprint at near-equal intensity. The same 60 to 70 percent of potential yield that was lost in Plant A is now converted into upper-canopy production in Plant B.
This comparison makes the yield benefit concrete: ScrOG does not generate yield from nowhere — it recovers yield that would otherwise be wasted on under-lit lower growth and converts it into productive upper-canopy bud sites through systematic canopy engineering.
ScrOG Multi-Plant Setups: Spacing and Coordination
While a single well-topped plant can fill a 120 x 120 cm ScrOG screen in 6 to 8 weeks, many growers prefer to run 2 to 4 plants under a shared screen to reduce total vegetative time. Multi-plant ScrOG setups come with their own coordination requirements that differ from single-plant grows.
The primary challenge is ensuring that all plants in the setup grow at a similar rate, so that the screen fills evenly without one plant dominating the canopy while another falls behind. Strategies for maintaining parity:
- Germinate seeds from the same batch simultaneously and select plants of similar size at node 3 to 4
- Use clones from the same mother plant where possible — genetic uniformity is the best guarantee of matching growth rates
- Position plants so their branches grow toward each other and toward the edges of the screen, maximising coverage of the total surface area
- If one plant is noticeably faster, redirect its branches to fill an outer corner of the screen while allowing the slower plant more time to catch up in the central area
In jurisdictions where plant count is restricted, a 2-plant ScrOG setup represents a common practical compromise: enough plant volume to fill a 120 x 120 cm screen in 4 to 5 weeks while remaining within typical 2 to 4 plant legal limits.
ScrOG in Perpetual Harvest Systems
A perpetual harvest system staggers cultivation cycles so that a new batch of plants is always in a different phase — one room in vegetative growth, another in flowering — allowing regular harvests rather than a single large harvest every 3 to 5 months. ScrOG integrates particularly well into perpetual systems because of its predictable schedule and consistent yield output per cycle.
A typical perpetual ScrOG setup uses two separate spaces (or two divided sections of a large tent): a vegetative/training space where plants are topped and woven into their screens, and a flowering space where fully-filled screens complete the flowering cycle. When the flowering space is harvested, the trained screen from the veg space moves in to begin flowering, and a new batch of seedlings or clones starts in the veg space.
The scheduling advantage of ScrOG in perpetual systems is that the vegetative training period (6 to 10 weeks) aligns well with a typical 8 to 10 week flowering cycle, meaning a new filled screen is ready to enter the flower space just as the previous one is harvested. This synchronisation, when achieved, produces a regular harvest every 8 to 10 weeks from the same two-space setup.
Common ScrOG Questions from Beginner Growers
Several questions appear consistently from growers encountering ScrOG for the first time. Addressing these directly helps avoid the most common beginner errors.
Do I need to top before using a ScrOG screen? No, but it helps significantly. An untopped plant will produce one dominant central shoot that fills the centre of the screen while leaving the edges sparse. Topping once or twice before beginning ScrOG training produces multiple branches that fill the screen more evenly and quickly. If you prefer not to top, LST applied before the screen installation can redirect the central shoot and initiate lateral branching as an alternative.
Can I reuse a ScrOG screen? Yes, if the screen is made from wire mesh or nylon cord that can be sanitized between grows. Clean the screen thoroughly with an isopropyl alcohol solution (70 percent) to remove plant material and potential pest eggs or fungal spores before reuse. Discard and replace nylon cord screens that show fraying, mould, or structural weakness.
What happens if I miss a few days of weaving? Missing 3 to 5 days of weaving during the active training phase typically results in some branches growing vertically through the screen rather than horizontally. These can usually be bent back down and woven if they have not yet become too woody. The further into the training phase, the more flexible the growth management window becomes — early training days are more critical than later ones once the canopy architecture is established.
Can ScrOG work in a hydroponic system? Yes, and it works very well. DWC (deep water culture) and NFT (nutrient film technique) systems produce fast, vigorous vegetative growth that can fill a screen in 3 to 4 weeks. The main practical consideration is screen height: ensure the screen is positioned high enough above the reservoir or channels to allow maintenance access without disturbing the trained canopy.
Lighting Upgrades That Transform ScrOG Results
The quality and quantity of light delivered to the ScrOG canopy is the single most important equipment variable in determining final yield. Modern LED technology has transformed the economics of home cultivation, and growers who upgrade from older-generation blurple LEDs or entry-level lights to high-quality quantum board LEDs typically see yield improvements that dwarf any other single change in their setup.
Key metrics to evaluate when selecting a light for a ScrOG grow: photosynthetic photon flux density (PPFD) in µmol/m²/s at the canopy level across the full tent footprint (not just at the centre), the uniformity ratio (edge PPFD divided by centre PPFD — aim for 0.7 or higher across the full canopy), and actual power draw at the wall rather than marketing wattage claims.
For a 120 x 120 cm ScrOG tent, a quality LED with 600 to 700 true watts draw and a uniformity ratio above 0.75 at 45 cm mounting height will deliver consistent PPFD across the entire screen surface — which is precisely the canopy geometry that ScrOG training creates. Matching the light’s coverage footprint to the ScrOG screen dimensions is the most direct path to maximising the yield potential of the technique.
Summary: ScrOG Setup and Training Key Points
The Screen of Green technique is fundamentally a light management system disguised as a plant training method. Every decision — screen height, mesh size, weaving frequency, flip timing, lollipopping schedule — serves the single goal of presenting the maximum amount of productive canopy to your light source at the most efficient angle. When all these variables are correctly calibrated, the results are consistently among the best achievable in home cultivation without extraordinary investment in equipment or space.
Build your first screen from basic materials: four wooden stakes and nylon cord create a perfectly serviceable training structure for under five euros. Focus your energy on the weaving technique and the flip timing rather than on equipment. The most expensive pre-made SCROG nets produce identical results to a hand-built cord screen when both are filled with the same well-trained canopy before the flip. The skill is in the grower, not the screen.
The ScrOG technique rewards patience and consistency above all else. Growers who visit their plants every one to two days during the training phase, weave methodically toward empty screen space, and hold the flip until the screen is genuinely 70 to 75 percent filled will find that the harvest reflects every hour invested. The screen is only as productive as the decisions made before the flip.
Document each grow with weekly canopy photographs taken from directly above the screen. This single habit, maintained across two or three consecutive ScrOG cycles with the same strain, produces a visual reference library that makes every subsequent flip timing decision objective rather than estimated. The difference between a 60 percent and 75 percent filled screen is obvious in a photograph; it is frequently misjudged by eye alone.