


By Jordan Price · Growing Guide · Updated May 2026
- Paper towel wins: The paper towel method delivers the highest success rates for home growers — it offers daily visual feedback, zero specialized equipment, and consistent results above 90% with quality seeds.
- Temperature is the master variable: Keep germination environment at 75–80°F (24–27°C). Below 65°F stalls germination; above 90°F damages the embryo irreversibly.
- Humidity matters: Aim for 70–90% relative humidity during germination. A humidity dome or covered plate maintains the moisture envelope required for the seed coat to soften and split.
- Taproot transfer timing: Move seeds to growing medium when the taproot is 0.25–0.5 inches. Longer taproots become fragile and easier to damage during transplant.
- Sex cannot be determined from seed: Neither visual inspection nor any folk technique reliably predicts sex. Use feminized seeds from a reputable breeder to guarantee females.
- Germination rate testing: Test 10 seeds from a new batch before committing the full supply. A batch below 70% germination rate signals compromised viability.
- Storage extends viability: Seeds stored at 40–45°F in an airtight container with a silica gel packet can remain viable for 2–5 years without significant decline.
What Happens Inside a Cannabis Seed
Germination is the biological awakening of a dormant embryo. Inside every viable cannabis seed, a miniature plant — containing a root tip (radicle), a shoot tip (plumule), and two seed leaves (cotyledons) — waits in suspended animation. The seed’s hard outer coat, the testa, protects it until environmental conditions signal safety: the presence of warmth, moisture, and darkness triggers enzymatic activity that breaks down stored starches into sugars, fueling cell division.
Water absorption causes the seed to swell, softening the testa. The radicle elongates and pushes downward, guided by gravity — a process called gravitropism. The shoot simultaneously bends upward toward the surface. This entire sequence, from water contact to visible taproot emergence, takes 24 to 72 hours under ideal conditions. Understanding this biology explains every recommendation in this guide: temperature governs enzyme activity, humidity governs testa softening, darkness prevents premature photomorphogenesis, and gentle handling protects the fragile radicle during transfer.
For a broader overview of the full grow cycle, see the growing resource hub and the cannabis cultivation basics explainer.
Method Comparison: Paper Towel, Soil, Rockwool, Water Glass
Four methods dominate home and commercial cannabis germination. Each has distinct trade-offs in terms of success rate, ease of execution, equipment requirements, and compatibility with downstream growing systems.
| Method | Success Rate | Ease | Avg. Time to Taproot | Best For | Key Risk |
|---|---|---|---|---|---|
| Paper Towel | 90–99% | Very Easy | 24–48 hrs | All growers, all systems | Taproot sticks to paper; handle gently |
| Direct Soil | 75–90% | Easy | 2–5 days | Soil grows; no-transplant preference | Overwatering drowns embryo |
| Rockwool / Rapid Rooter | 85–95% | Moderate | 2–4 days | Hydro, coco, DWC systems | pH must be adjusted before use |
| Water Glass Pre-soak | 70–85% | Easy | 12–24 hrs (then transfer) | Hard-shelled older seeds | Drowning if soaked over 32 hours |
Step-by-Step: Paper Towel Method
The paper towel method remains the gold standard for home growers. It provides direct visual access to taproot development, requires no specialized equipment, and is compatible with every downstream growing medium — soil, coco coir, hydro, and DWC alike.
- pH-adjust your water to 5.8–6.5 using a reliable pH meter. Tap water in most municipalities runs at pH 7.0–8.0 and should be adjusted down.
- Moisten two paper towels thoroughly but not dripping. Excess water promotes anaerobic conditions and mold.
- Place seeds on one half of the towel, spacing them at least one inch apart to prevent taproots from tangling.
- Fold and cover the second towel over the seeds. Place on a plate and cover with a second plate or plastic wrap to maintain humidity.
- Store at 75–80°F in a dark location. A seedling heat mat set to 78°F removes temperature variability entirely.
- Check daily without disturbing the setup. Re-moisten only if the towel begins drying out.
- Transfer when taproot is 0.25–0.5 inches. Use tweezers or a toothpick — never touch the taproot directly. Plant with taproot pointing down, 0.5 inches deep.
Environmental Parameters Table
| Parameter | Optimal Range | Minimum | Maximum | Notes |
|---|---|---|---|---|
| Temperature | 75–80°F (24–27°C) | 65°F (18°C) | 90°F (32°C) | Heat mat with thermostat eliminates guesswork |
| Relative Humidity | 70–90% | 50% | 95% | Humidity dome or covered plate is sufficient |
| Water pH | 5.8–6.5 | 5.5 | 7.0 | Extreme pH prevents enzyme activation |
| Light | Dark | — | — | Light not needed; darkness preferred for germination |
| Planting Depth | 0.5 in (1.25 cm) | 0.25 in | 1.0 in | Too deep delays emergence; too shallow exposes seed |
| Taproot Size at Transfer | 0.25–0.5 in | 0.1 in | 1.5 in | Longer taproots snap easily on transfer |
Germination Failure: Causes and Fixes
Understanding failure modes prevents repeated mistakes. The table below covers the seven most common reasons for germination failure and the specific corrective action for each.
| Failure Cause | Symptom | Fix |
|---|---|---|
| Temperature too low | No activity after 4+ days | Add seedling heat mat; target 78°F |
| Overwatering / waterlogged towel | Seed rots; mold develops | Squeeze excess water from towel; should be damp, not wet |
| High chlorine tap water | Slow or failed emergence | Let tap water sit 24 hrs or use filtered water; pH-adjust |
| Old / degraded seeds | Seeds swell but never crack | Pre-soak 12 hrs; light scarification of seed coat with sandpaper |
| Planted too deep | Seedling struggles to reach surface | Plant no deeper than 0.5 in; 0.25 in for small seeds |
| Taproot damaged on transfer | Seedling fails to establish | Use tweezers; never touch taproot directly; move at 0.25–0.5 in |
| Non-viable seeds | No activity after 7 days | Test batch viability; source fresh seeds from reputable breeder |
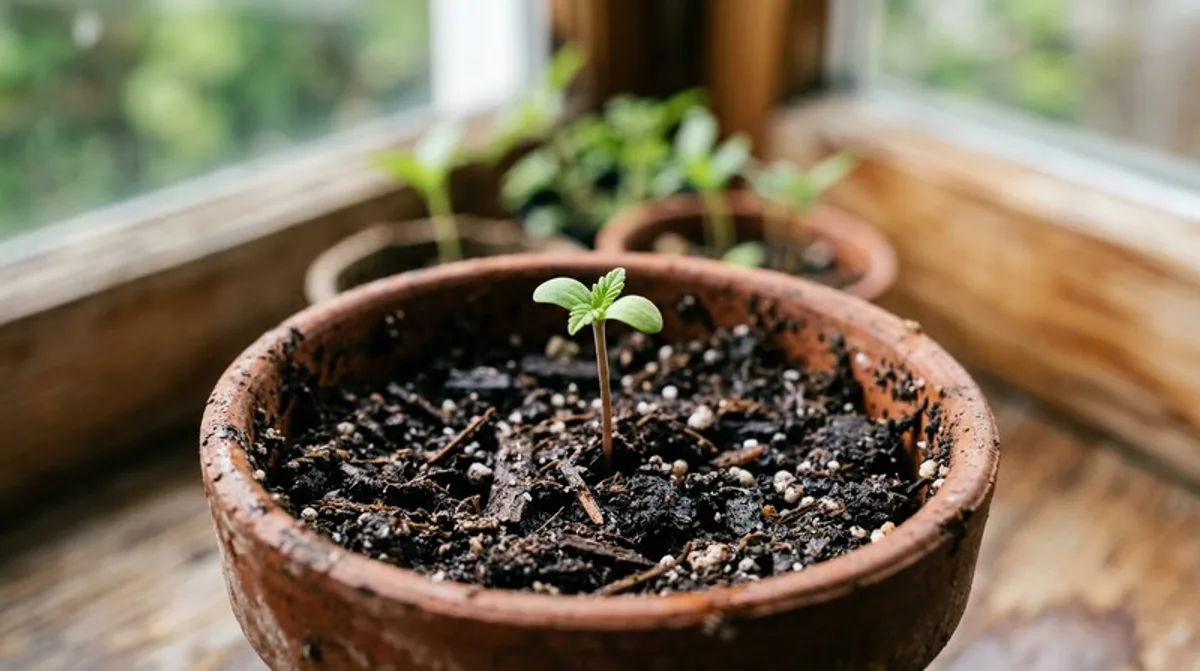
Seedling Care: First Week After Germination
Once your seedling has emerged and the cotyledons (seed leaves) have opened, the plant enters the seedling stage. This phase is critical — the root system is minimal and the plant has almost no buffer against environmental stress. Light intensity should be low: 18–24 inches from a CFL or LED running at 100–200W. The LED grow light guide covers optimal PPFD targets by growth stage. Maintain temperature at 72–78°F and relative humidity at 65–70%.
| Day | Expected Development | Care Action | Watch For |
|---|---|---|---|
| Day 1–2 | Cotyledons open; stem straightens | Mist substrate surface; keep humidity dome on | Damping off (stem rot at soil line) |
| Day 3–4 | Cotyledons fully spread; first true leaves forming | Remove dome for 1–2 hrs daily to harden off | Stretching (too little light) |
| Day 5–6 | First true leaf set visible | Begin light watering at pot perimeter to encourage root spread | Overwatering; yellowing cotyledons |
| Day 7 | Established seedling; 1–2 true leaf sets | Transition to full veg lighting schedule (18/6) | Nutrient deficiency (too early for heavy feeding) |
Storing Seeds for Long-Term Viability
Proper seed storage is as important as germination technique. The three enemies of seed viability are heat, light, and moisture. Each triggers enzymatic activity that slowly degrades the embryo and depletes the seed’s stored food reserves. Seeds stored under ideal conditions retain 80–90% germination rates after two years; poorly stored seeds can lose viability within six months.
Best practice: place seeds in a dark glass vial with a silica gel packet, seal tightly, and store in the back of a refrigerator at 40–45°F. Avoid the freezer unless seeds are vacuum-sealed — freezing and thawing cycles cause cellular ice crystal damage. Label containers with strain name, breeder, and date of acquisition. When removing seeds for germination, allow the container to reach room temperature before opening to prevent condensation inside the vial.
For strain-specific germination considerations and growth characteristics, browse the complete strain library. Autoflowering strains deserve special attention: their accelerated life cycle makes germination timing and early seedling care even more critical since there is no opportunity to compensate with extended vegetative time. See autoflower strain profiles for more detail.
